Use your current project as a template!
One of the most time-consuming stages during the design of reinforced concrete structures is the calculation and generation of documentation for elements such as beams or reinforced concrete columns. And usually, it is not about the complexity of calculations or difficulties in generating drawings, but rather a large number of such elements in each project. And as in practice, we use dedicated software for designing, and it is mainly on the capabilities of this software and the ability to use it that the efficiency of work depends.
In this short article, we will address one of the key issues to reduce work time, namely creating and using design templates in design modules of Advance Design. The mechanisms described below are available in all design modules, including RC Beam, RC Column, RC Wall, RC Footing and Steel Connection module.
Creating project templates with Advance Design modules is very simple and consists in saving the current settings from the current project to a file. To start with, we perform a full design process of an element (for example the first beam in the project), and as a result, all the required settings are already defined and tested. Then we call the command to save the template and enter a name for the template file. From now on, the same settings as in the current project can be applied to other similar elements.
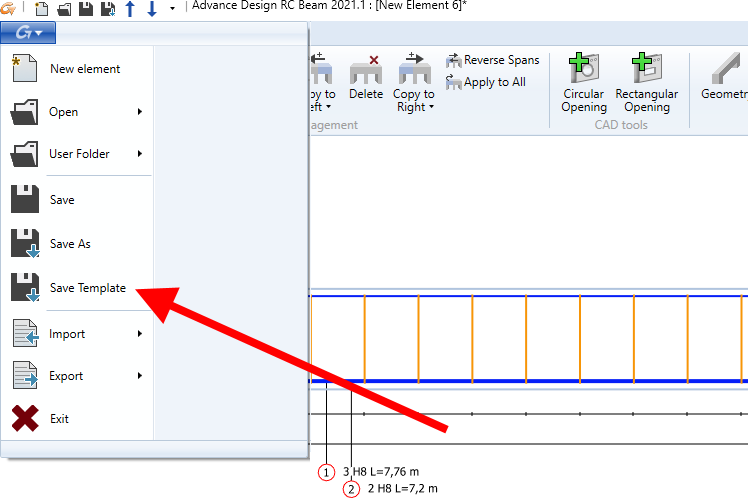
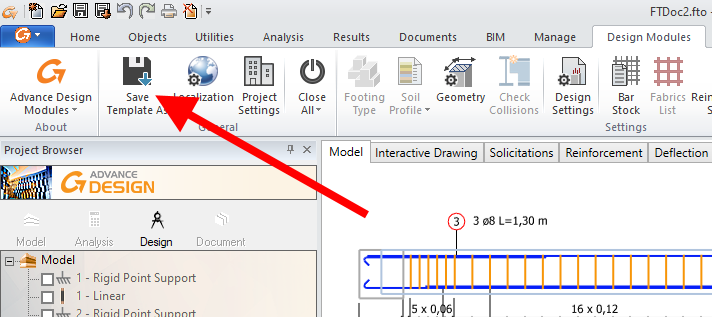
Saving the new template is possible when we run the module for dimensioning in the standalone version (image above) as well as from the menu in Advance Design (image below). In both cases, the template is saved to the selected location on disk as a file.
Thanks to the fact that template creation is based on saving settings of the current task we can easily add new templates in every stage of work.
Generally, it is a good idea to prepare one or more general templates. We set parameters that we always want to use in all projects, like settings related to design codes, general reinforcement settings, range of reinforcing bar diameters used, etc. These will be starter templates, primarily used for the first element in a given project.
Then, while working with a given new project, it is usually useful to prepare several current templates, specific for that project. These may be templates with different settings related to the location of the element in the building (then they differ in settings like concrete cover, fire conditions, etc.), or templates related to geometry (for example separate for edge beams, T-beams, etc.), or with different settings related to reinforcement design (for example with other methods of constructing transverse reinforcement). It all depends on us.
It is important that when saving the template, all information is stored, including project settings, geometry, design parameters, reinforcement parameters or list of load cases and combinations.
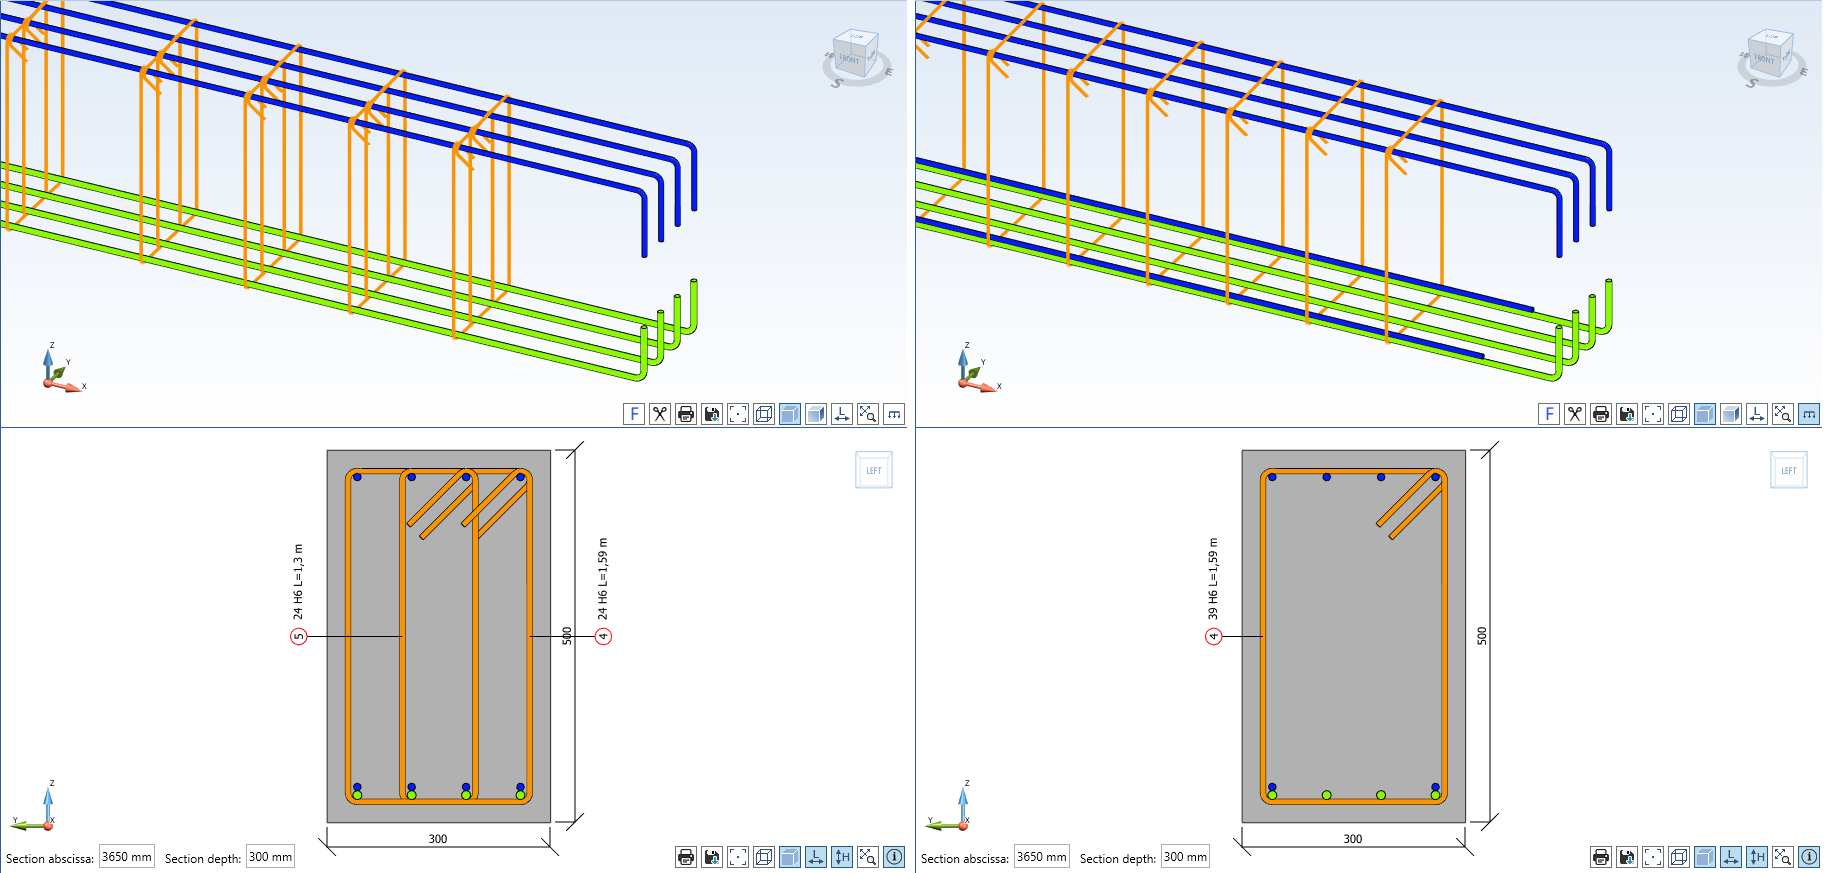
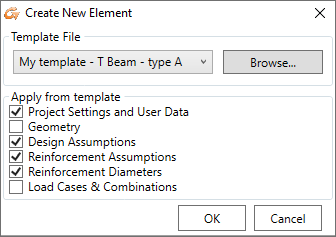
But even more interesting is the fact that in Advance Design modules, when applying templates, we can decide on the scope of data that is loaded from the template. That means that when creating a new task based on a template, we can easily choose what to load from the template. Let’s see a simple example. We have saved a template for a multi-span T-beam with specific reinforcement settings, with defined specific list of load combinations, etc.
Next, we want to use this template to design another beam, but this time it will be a single-span beam with a different list of load cases while keeping all the other settings. To do this, when creating a new job, we can deselect the geometry and load settings when selecting a template:
The above method is useful, especially when creating new elements / subsequent beams in the standalone version of the program, when we enter all the data ourselves, including loads.
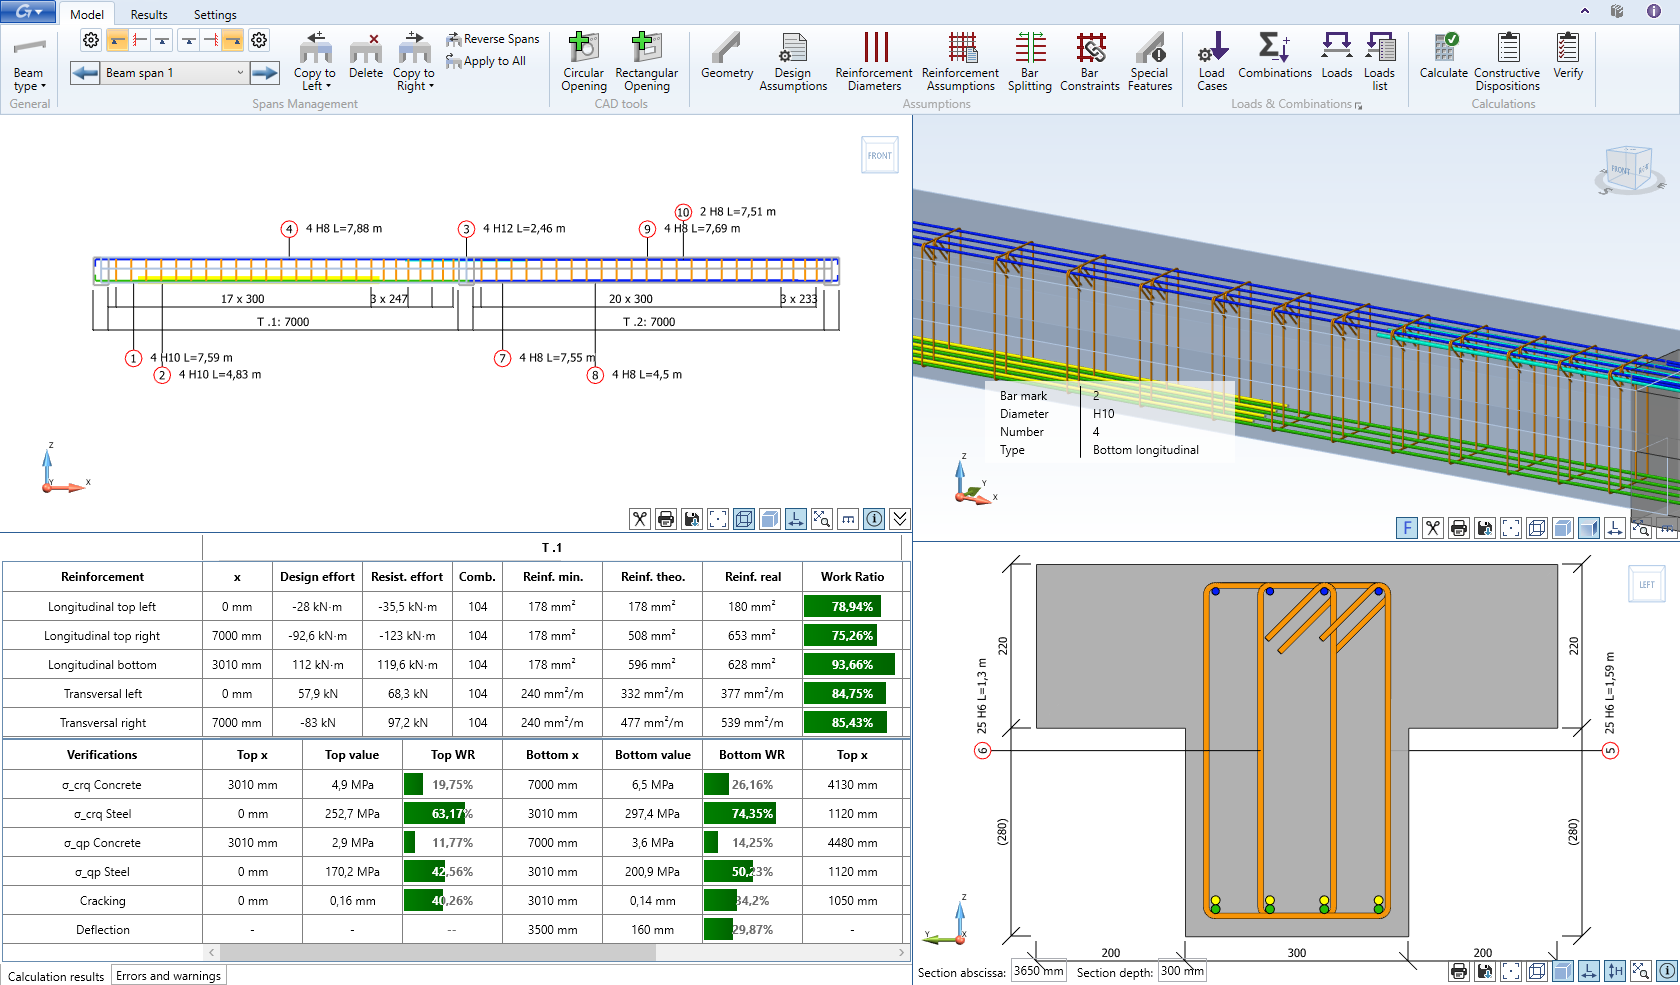
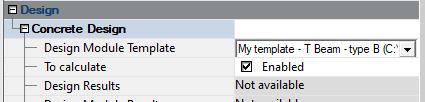
The approach is slightly different if we base on the FE model prepared in Advance Design and perform calculations in the design modules directly in Advance Design, or if we perform design calculations in stand-alone modules after exporting the element data to files. In this case, we are not defining the element from scratch because we already have the element with a defined geometry and internal forces, but we want to use our own templates to set all other parameters of the element. To do so, the template must be assigned to the element in Advance Design before sending it to the dimensioning module. This selection is made from the element properties in Advance Design.
Remember that the list of available templates then shows the names of template files located in the corresponding subdirectory on disk, which is different for each element category (beams, columns, walls, foundations or steel connections). All of these subdirectories are grouped into one master template directory in the User Folders of Advance Design’s design modules. The location of these directories is visible, for example, when saving templates.
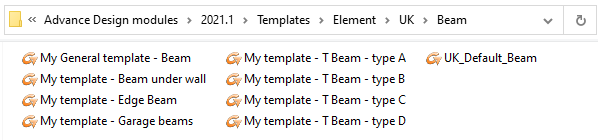
So if you want to use different ranges of templates for different projects, it’s most convenient to simply archive/copy individual subdirectories or the entire main element template directory.
Of course, the use of project templates is basic but not the only way to increase the efficiency of the design process. Another way is to use your own drawing templates used by the Advance Design modules so that the time spent preparing and adjusting the reinforcement drawings is greatly reduced.

Another way is to optimize the workflow – for example, we can easily export the data for the design of reinforced concrete elements from Advance Design to files, separately for each element, and then distribute them to the individual team members. Then they can carry out the design and documentation process in parallel on separate computers using the stand-alone versions of the modules. In addition, the reinforcement files can be copied back into the project structure in Advance Design.
But this is a topic for a separate story…
