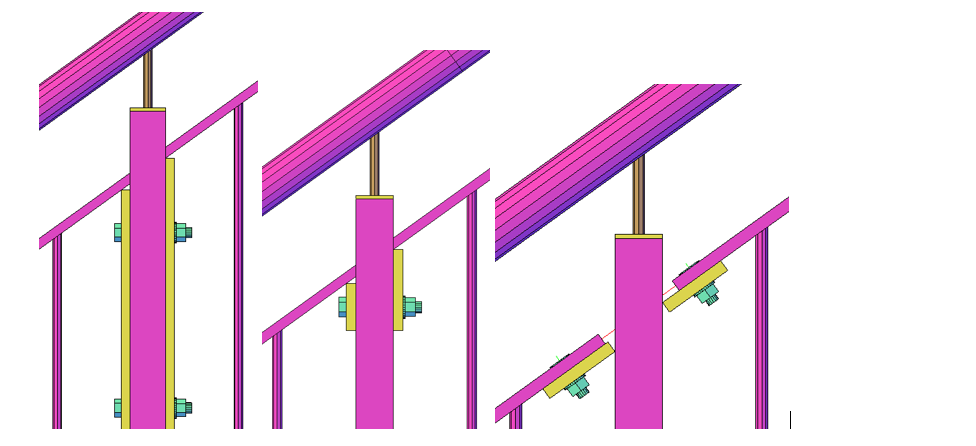
Recently introduced into the Graitec Stairs and Railings, deployed as part of the PowerPack for Advance Steel, is the New Lug feature for Railings. This new feature allows user to split up the infill panels for site installation, making it easier to transport and install these items if difficult site workspaces, I speak from experience here when trying to transport and install Railings with solid bar infills, can be quite a challenge in the confined space of a Stairwell.
Behind this new feature there are essential settings that can allow the user different types of configurations for the user to allow for combinations needed for full and partial assembly.
Basics of Railings Lug Activation.
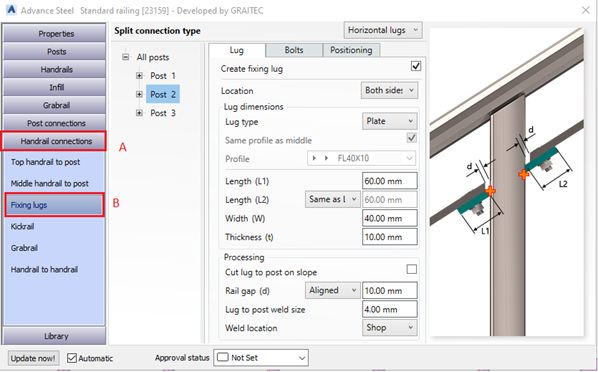
The railing lug option inside the Railing macro is available working with mid-rails to post connections, it is available under the Handrailing Connection Tab, as a sub tab Fixing lugs.
Important Setting 1
When you first go to the Fixing lugs tab you may see a dialog page that has a warning message about the availability of the lugs, this is default settings that is driven by the settings under the Middle Handrail to post Tab
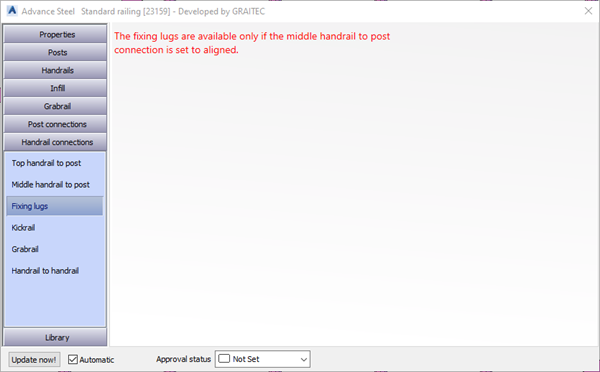
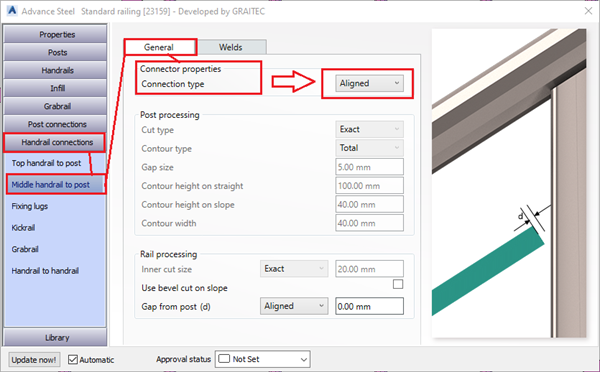
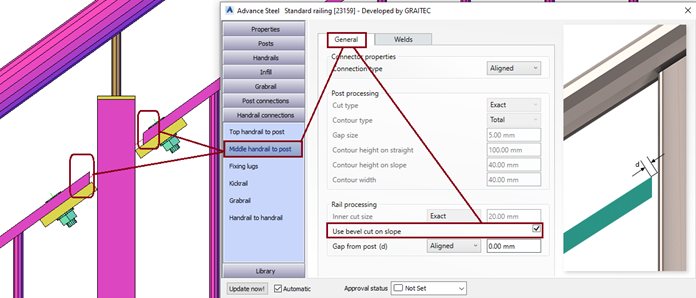
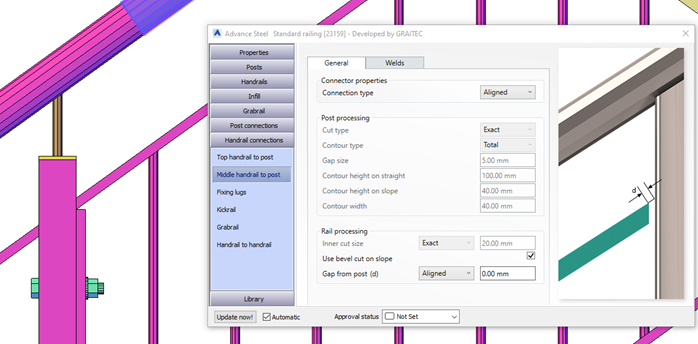
The message shown above is driven by the setting in the Middle handrail to post, from the General Tab Connection properties, connection type, the combo box must be set to Aligned.
Middle handrail to post,>General Tab> Connection properties> connection type> combo box > Aligned.
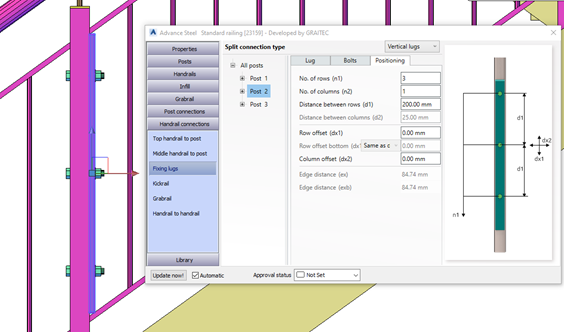
Setting this and returning to the Fixing lugs, the user will then see the option to activate lugs for all or each post location.
On the Fixing lug page, the user will start with a combo box set to ‘ No Lugs’, changing this drop down will enable the fixing lugs, noting that the user has a choice to select which method of lugs they wish to use.

When selected the lugs are then active and the user can start changing the lugs arrangements.
Important setting 2
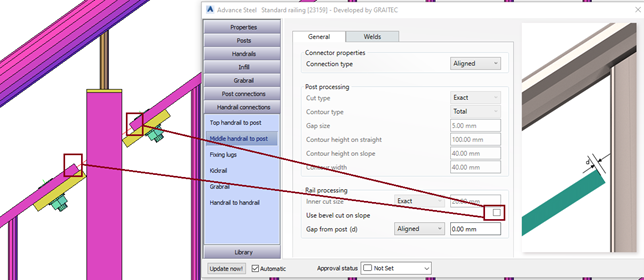
So, the user has set the lugs to horizontal, this means the lugs are positioned along the adjoining mid rail. But when we set the mid rail Connection type to aligned, then the user must look down in that dialog to change the Check box for the ‘Use Bevel cut on Slope’, unchecking this box will make the mid rail ends change to a square cut end.
Unchecking the box will change the mid-rail ends as shown in in the next image
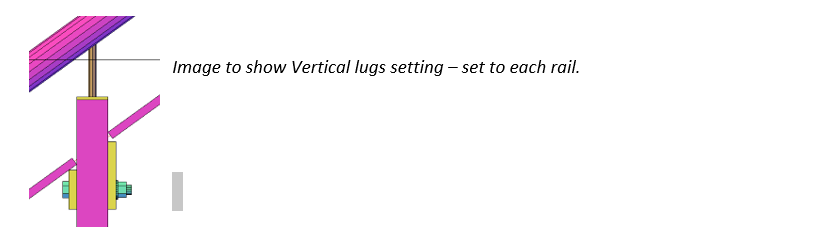
Lug Types (tip for full vertical closure type)
We saw in the initial drop down that the user can have both horizontal and vertical lugs, but there is another variation under Vertical type, that is a Full Vertical type. This type can be used to create an end closure to a railing panel that is bolting through and adjacent post. Useful for when railing panels are too long and need splitting into manageable sections for installation.
The user can change the basic lug type to Vertical from the initial combo box, see top of the dialog tab. Then using the Type combo box, the user will see options for ‘Each middle rail’or ‘Full Height’, Changing to full height will place a continuous vertical section at the panel end or start depending upon the location settings.
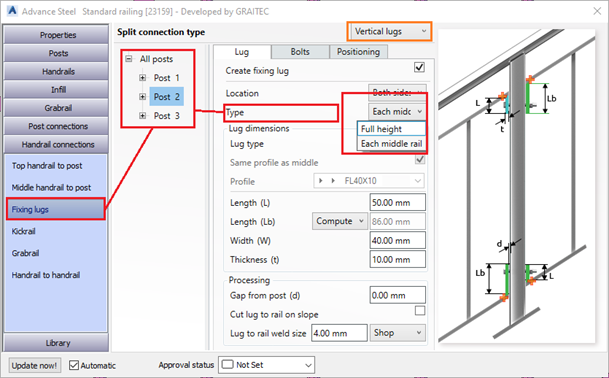
Also another nice feature of the Graitec Macro, is the dialog Tree Structure that allows the user to set the same parameters and types for all the posts in the railing panel, or for each posts, note the structure in the dialog and see that in this instance we have chosen to select Post 2 location, as we wish to split the Top rail at this location also. (split top rail is feature of the Graitec Railings.)
When this is applied you can also go back and change the mid rail ends to give a sloping cut and if required to vertical Flat Section, noting that we changed from Plate to Rolled Steel flat bar section, same as the handrail profile (Could also be different if required.)
There are many other features of the Graitec Railings macro that allow users to progress their designs efficiently and quickly and store settings that they commonly reuse within the product ranges.
Look out for more Tips of using the Graitec Railing tools in our blogs and Video postings.
Article by – John Bennet / Senior Product Specialist / GRAITEC
